Fiber Flower Tutorial
A few years ago during an unusually wet and grey winter in Portland I decided to make flowers, yes, flowers made with canvas and fabric. I enjoyed making them and giving them away for special occasions to dear friends.
Pretty soon I received requests to teach a class but my reply was always “they are just miniature fiber bowls with a little mounting engineering, you can do it”. The requests continued coming in and that is why I finally decided to share the making of the flowers here on my blog.
The process starts with a mini fiber bowl of approximately 6” diameter. You can find detailed instructions for fiber bowls here. The only difference is that instead of starting with two layers of canvas, we only use one layer. Cut a circle, cover with fabric, cut wedges, shape with zigzag stitch.
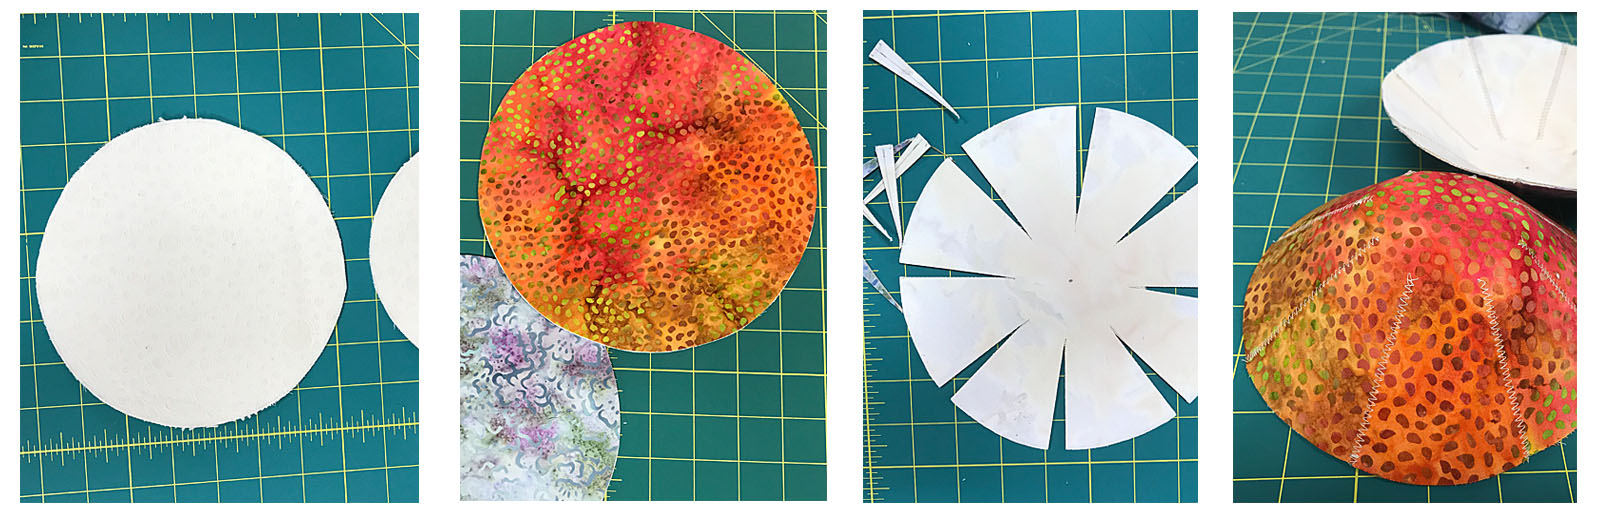
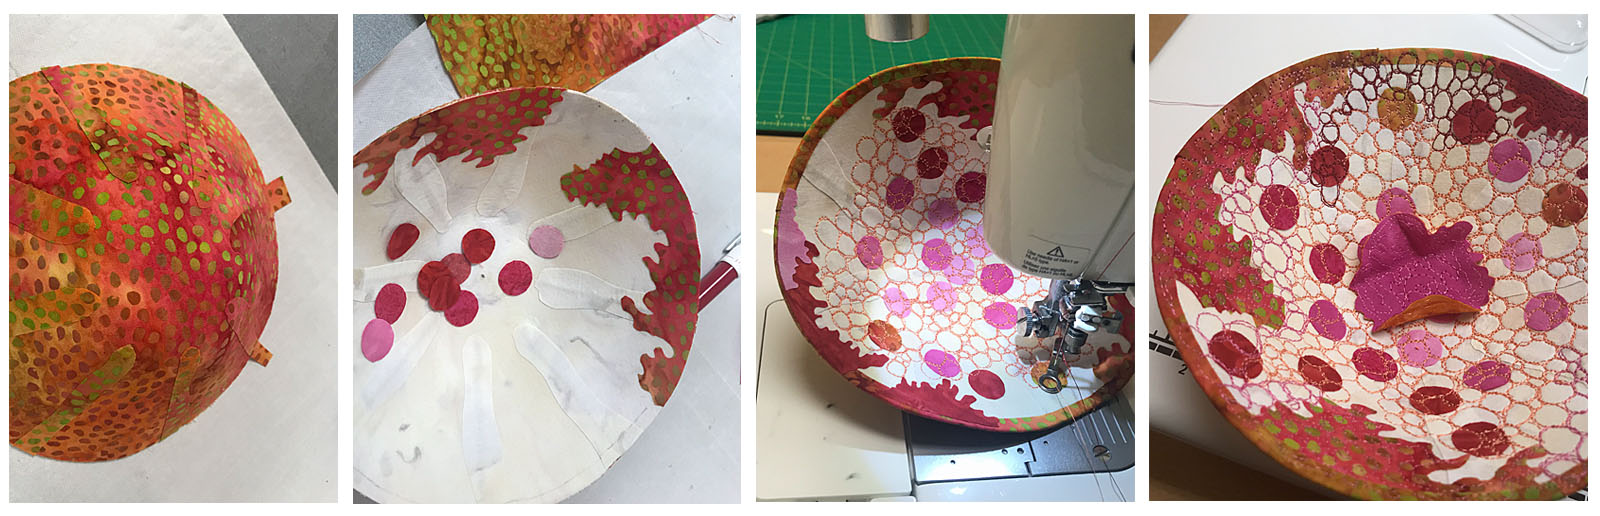
Cover the zigzag stitches with fabric inside and outside of the flower, decorate the flower inside (and outside if you wish) and add decorative stitching.
Now onto the mounting part! Of course you can figure out your own method but here I will describe what I have come up with. My goal was to create a flower that would be sturdy and could endure rough handling.
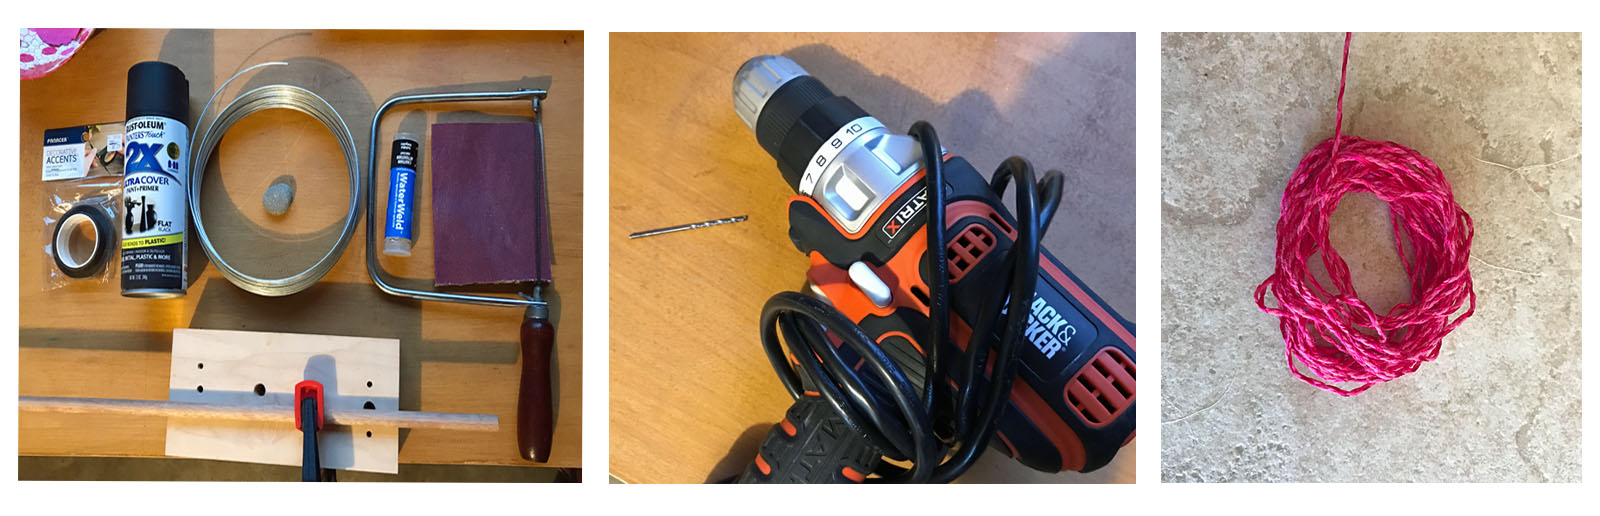
You will need: a wooden dowel (approx. ½” diameter), clamps, floral tape (I use brown), black spray paint, thick metal wire, flat rock, saw, sand paper and epoxy putty.
You also need a drill with a bit that is very close to the diameter of your wire, and a piece of decorative yarn.
Once you’ve gathered your materials and tools, let’s start. Clamp the dowel to a table and saw a small cylinder of about ½ “ length. Sand the rough edges of the cut cylinder and drill a hole in the middle lengthwise.
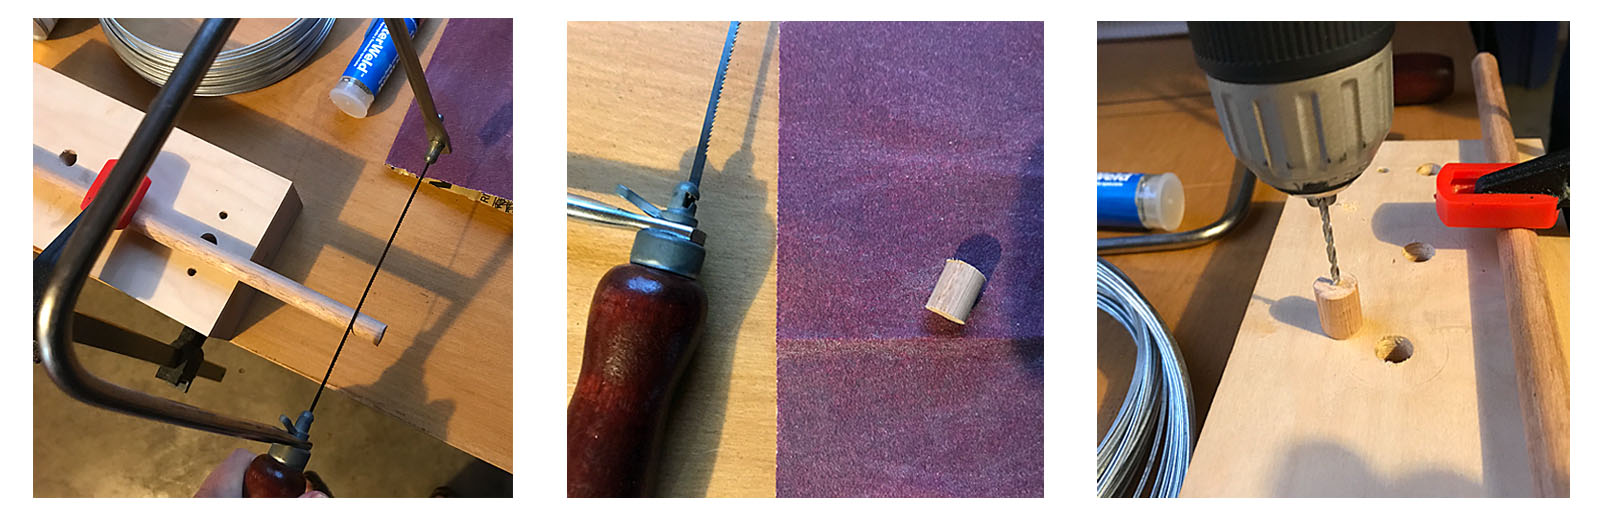
Cut a piece of wire (this will be your flower stem) and poke it into the wooden cylinder you just cut. Paint the wooden cylinder with the spay paint and let dry. It may need two layers of paint. Take your fiber flower and draw an X where you would like the stem to be attached.
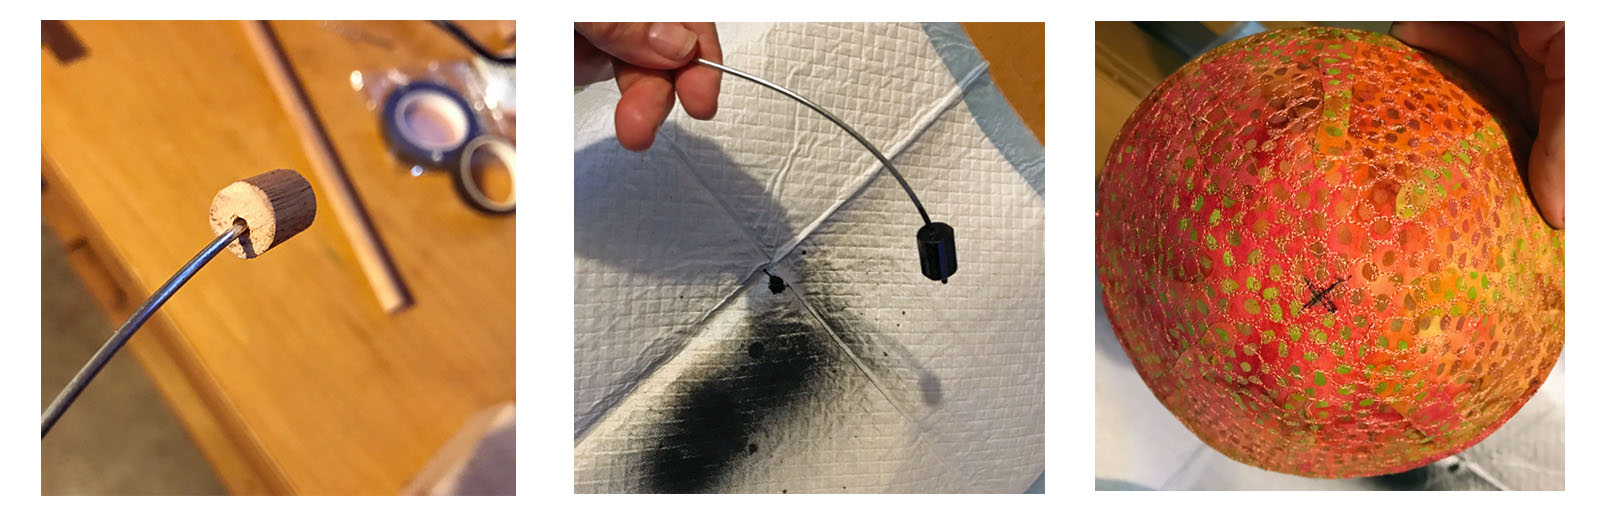
With sharp scissors cut through that X (Yes, you are cutting through your beautiful flower!) Make sure that X is about the size of your cylinder diameter (in this case, ½” max). Push the dried cylinder, which is attached to the wire, through that X hole until you see it coming out through the inside of the flower. It should be a snug fit.
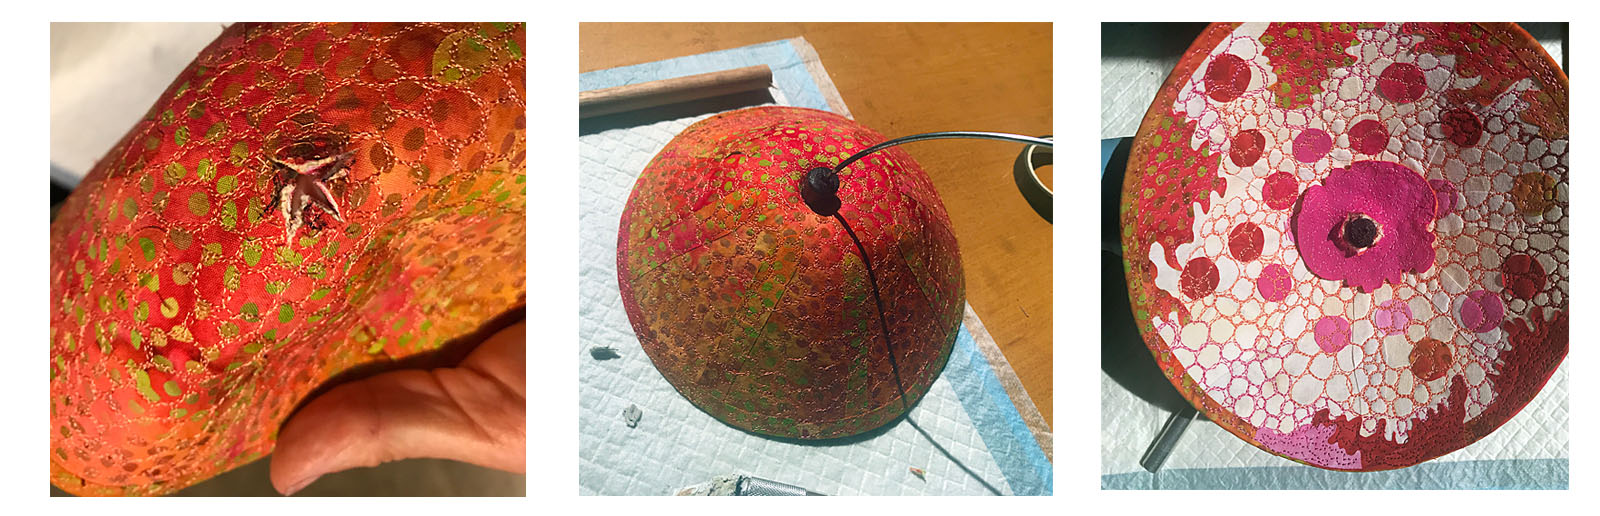
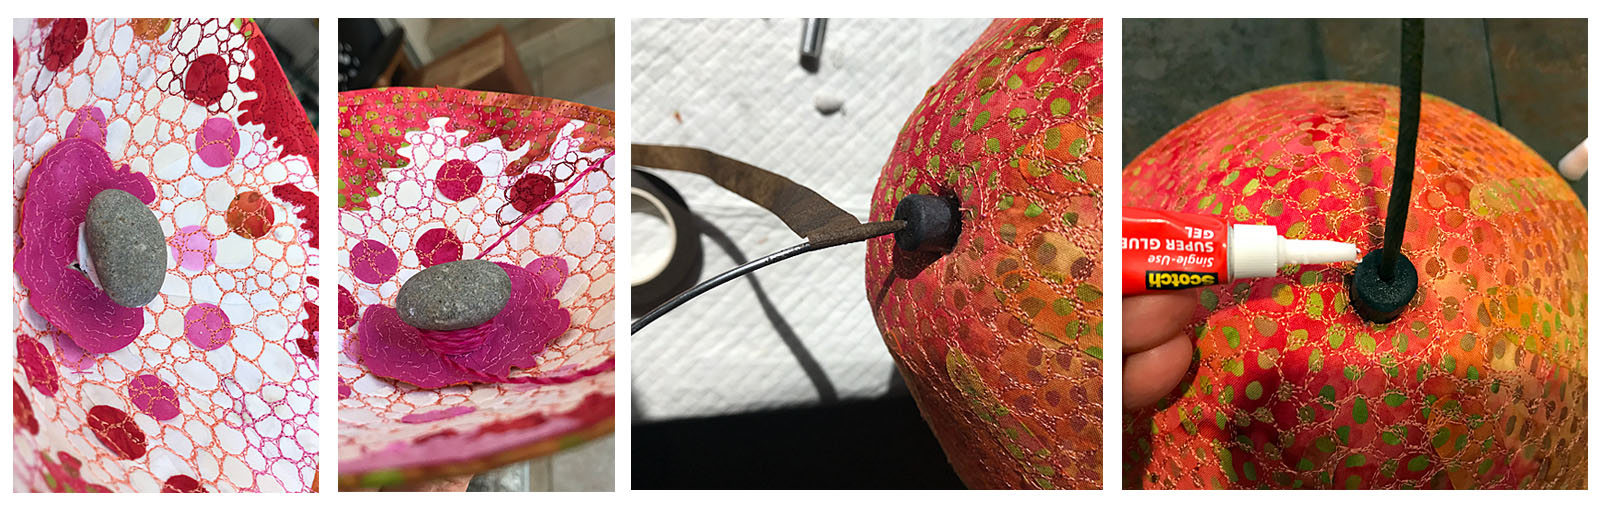
Working from the inside of the flower, put some epoxy putty on the cylinder that is peeking through and place the rock on top. Push down and let the epoxy dry. Once dried, you’ll notice that it will be hard to detach, that’s why I use epoxy as my glue. To fine tune, wrap your decorative yarn around the visible epoxy under your rock until it looks nice and clean. Tie and cut off. Wrap the stem with floral tape and you are done!
If your wooden cylinder does not feel snug around the wire, you can add a drop of crazy glue to secure it.
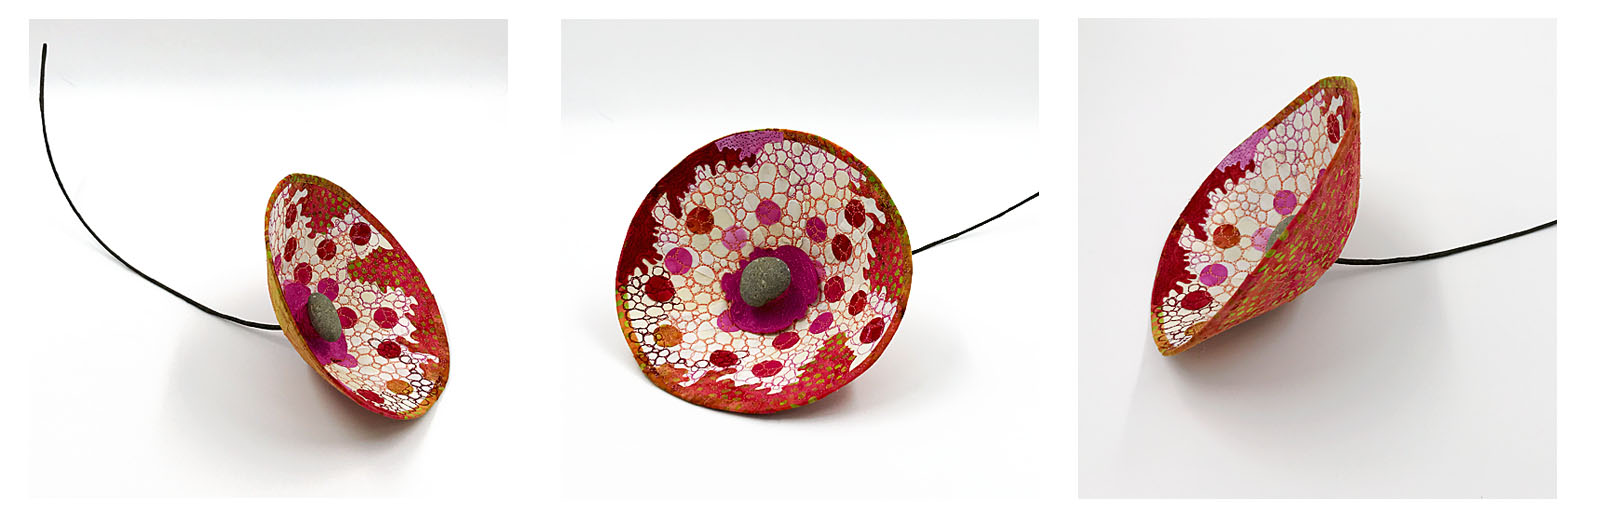
That’s it, you’ve created a flower! ENJOY!
Notice that my blog is not setup to answer comments/questions individually. However, I will answer questions by posting a comment.
Comments
Lynne Forrest (Sep 8, 2019)
toni f. Smith (Sep 7, 2019)
Stone (Sep 6, 2019)
Pat Fifer (Sep 5, 2019)
Jan Quick (Sep 5, 2019)
Deb (Sep 5, 2019)
Penelope Byrd (Sep 5, 2019)
Bev Longford (Sep 5, 2019)
Melanie (Aug 31, 2019)
Maureen (Aug 31, 2019)
Tech support husband (Aug 30, 2019)
Lisa (Aug 30, 2019)
Ricardo (Aug 30, 2019)
Leave a comment